 donald
Lighting a room with a fireplace as the focal point requires layering ambient, accent, and task fixtures to draw the eye toward the hearth while maintaining balanced illumination throughout the space. Before you begin, ensure your chimney and fireplace are structurally sound; consult Mason Chimney Repair if you need maintenance work completed first, as damaged brick or flue issues can interfere with both safety and the visual integrity of your design. The key method: install adjustable recessed downlights above or flanking the mantel, pair them with wall sconces or picture lights to highlight the fireplace surround, and use dimmable controls to let you shift mood from functional brightness to intimate glow. Done correctly, this approach takes one to two days for a typical living room and ensures your fireplace commands attention without casting harsh shadows or competing with secondary light sources.
The challenge lies in preventing ambient ceiling fixtures from overwhelming the fireplace or creating glare on the mantel and hearth. Most homeowners default to a single overhead chandelier or flush mount, which casts flat, uniform light and robs the fireplace of its architectural drama. Strategic placement of accent fixtures, concealed LED strips behind crown molding, and directional trims transforms the fireplace into a three-dimensional feature that holds attention day and night. This guide walks you through fixture selection, wiring considerations, placement math, dimmer integration, and final adjustments so your lighting plan reinforces the fireplace as the room’s undisputed centerpiece.
What You’ll Need: Lighting Tools and Materials
Before you begin any lighting work around your fireplace, gather the right fixtures, hardware, and tools. The materials you choose determine whether your lighting enhances the fireplace’s prominence or fights against it. This list covers three lighting layers, ambient, task, and accent, plus the electrical components and basic tools needed for safe installation.
- Ambient lighting fixtures: Recessed ceiling lights (4-inch or 6-inch IC-rated housings), flush-mount ceiling fixtures, or track lighting to provide general room illumination without competing with the hearth
- Accent lighting: Adjustable recessed trims, picture lights for mantel art, LED strip lights for grazing stone or brick texture, or low-profile wall washers to highlight architectural details
- Task lighting: Floor lamps with three-way switches, table lamps with opaque or translucent shades, swing-arm wall sconces for reading areas adjacent to the fireplace
- Dimmer switches: LED-compatible dimmers (trailing-edge or ELV type) for each lighting circuit, or smart dimmers with app control and preset scenes
- Electrical hardware: Junction boxes rated for fixture weight, 14-gauge or 12-gauge NM cable, wire nuts, mounting brackets, wall plates
- Basic tools: Drill with spade bits, wire stripper, non-contact voltage tester, screwdrivers (flat and Phillips), stud finder, measuring tape, level
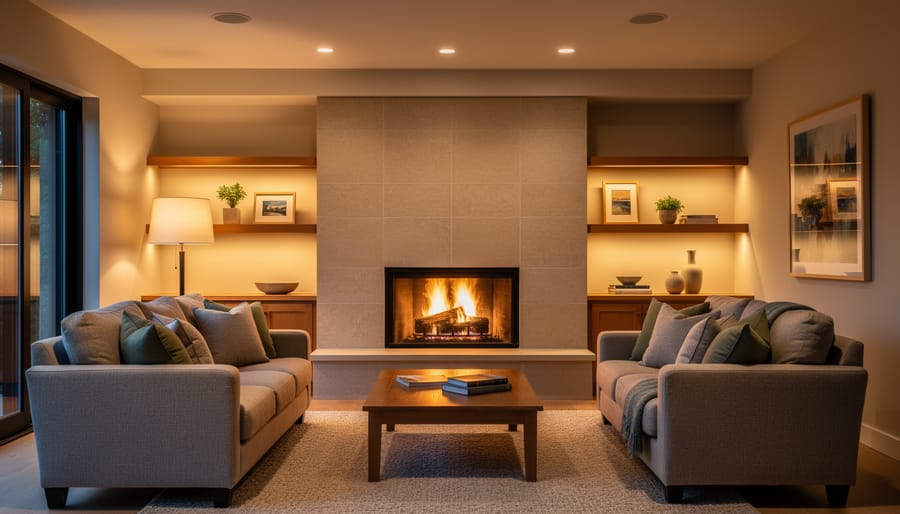
Each category plays a specific role when the fireplace is your focal point. Ambient fixtures establish baseline visibility across the room, but they should cast a soft, even wash that defers to the fire’s glow. Accent lighting frames the fireplace itself, drawing attention to the mantel, surround materials, or artwork above the hearth. Task lighting serves seating areas where people read or converse, ensuring those zones remain functional without stealing visual weight from the fireplace. Dimmer switches give you control to shift the balance as the fire burns or when the hearth is inactive, letting you dial down competing sources and keep the fireplace dominant. Proper hardware and tools ensure safe, code-compliant installation that protects both your wiring and the fixtures from heat exposure near an active fire.
Safety Warnings and Electrical Considerations
Before you run a single wire or mount a fixture, understand the hazards. Electrical work around a fireplace introduces risks beyond typical lighting installations: heat exposure, code-mandated clearances, and circuit loads that can trip breakers or worse. Taking shortcuts here can lead to fire, shock, or costly permit violations.
Know your limits. If your plan involves adding new circuits, working inside junction boxes you have never opened, or installing fixtures within 36 inches of a fireplace opening, hire a professional. Most jurisdictions require permits for new wiring, and inspectors will flag improper clearances or overloaded circuits. A licensed electrician understands load calculations, can pull permits, and ensures compliance with the National Electrical Code and local amendments.
Heat clearances are non-negotiable. Recessed fixtures installed directly above or beside an active fireplace must be rated for elevated temperatures. Standard housings can warp, and insulation contact (IC) ratings do not address radiant heat from below. Maintain at least 12 inches of horizontal clearance from the firebox opening for any fixture, and never mount a fixture where it will be subjected to direct flame or sustained temperatures above its rating. Gas and wood-burning fireplaces generate significant heat; even electric units can exceed safe thresholds for nearby electronics and plastic components.
Calculate your circuit load before adding fixtures. A 15-amp circuit can handle roughly 1,440 watts of continuous load. If you are adding recessed lights, sconces, and dimmer switches to an existing circuit that already serves outlets or other fixtures, you risk overload. Separate high-draw accent lighting onto its own circuit, and label your breaker panel clearly. Overloading creates nuisance tripping at best, and fire hazards at worst.
Step-by-Step: How to Layer Lighting Around Your Fireplace
Step 1: Map Your Room’s Lighting Zones
Start by walking through your room and marking four distinct zones on paper: the fireplace wall itself, seating clusters arranged to face the hearth, pathways leading in and out of the space, and any task areas like reading nooks or side tables. Stand where guests naturally gather and trace imaginary sight lines to the fireplace, these paths should remain visually clear, uninterrupted by bright fixtures that pull focus away from the hearth.
Each zone needs a different lighting layer. Ambient light provides overall visibility without competing with the fire’s glow. Task lighting serves specific activities in seating areas, reading, conversation, without casting shadows on faces turned toward the fireplace. Accent lighting highlights the mantel, surround texture, or artwork above the hearth, reinforcing its prominence.
Sketch your room from above and label where each layer belongs. Note spots that currently feel too bright or too dim when the fire is lit. Mark areas behind the main seating arrangement where softer fill light prevents the room from feeling cave-like. This map becomes your blueprint for fixture placement, ensuring every light source supports rather than undermines the fireplace’s central role.
Step 2: Install Ambient Lighting That Defers to the Fireplace
Ambient lighting sets the room’s baseline visibility without stealing focus from the hearth. Position recessed ceiling lights or flush-mount fixtures toward the room’s perimeter rather than directly above the fireplace. This placement prevents a bright ceiling hotspot that competes with the fire’s natural glow. Space recessed cans 4 to 6 feet apart in a grid that covers seating and circulation areas while leaving the zone immediately above the mantel less densely lit.
Choose fixtures with wide flood beam angles (40 to 60 degrees) instead of narrow spots. Wide beams distribute light evenly across the ceiling and upper walls, creating soft, general illumination that recedes into the background. Narrow beams create bright pools that draw the eye upward and away from the fireplace.
Select bulbs in the 2700K to 3000K color temperature range. These warm tones mimic the amber-orange hues of firelight, creating visual harmony when the hearth is active. Cooler temperatures (above 3500K) produce a bluish cast that clashes with flames and makes the fireplace feel disconnected from the room’s overall lighting palette. Install all ambient circuits on dimmers so you can lower intensity when the fire provides sufficient glow.
Step 3: Add Accent Lighting to Frame the Fireplace
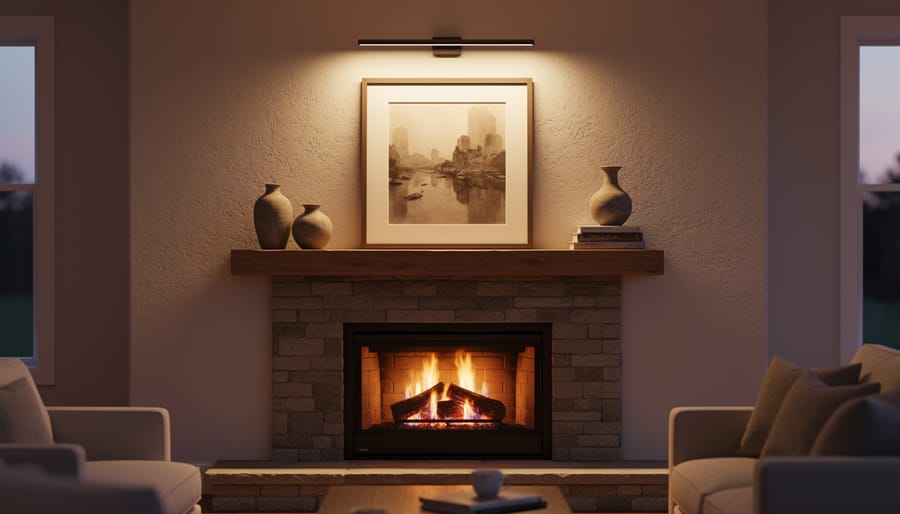
Accent lighting draws the eye to the fireplace’s architectural features without competing with the flames themselves. Picture lights mounted above mantel artwork direct a narrow beam downward, creating a gallery effect that elevates the entire composition. Position these fixtures 6 to 12 inches above the frame, angled at 30 degrees to minimize glare on glass or glossy surfaces.
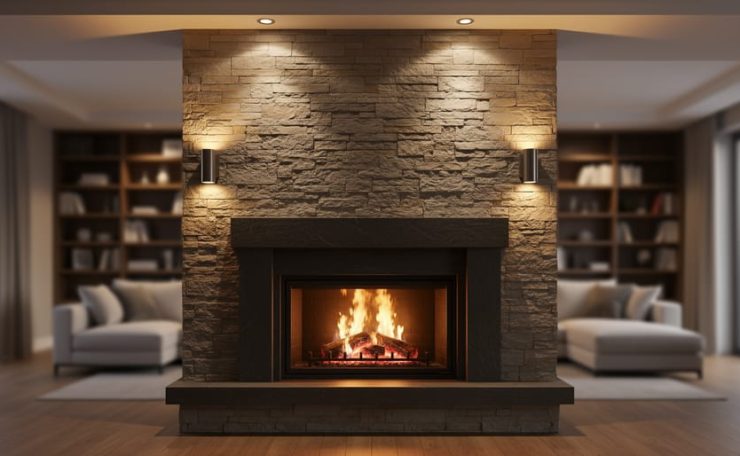
For textured surrounds like stone, brick, or tile, grazing fixtures work best. Install LED strip lights or narrow-beam wall washers at the top or side edges of the surround, placing them close enough that the light skims across the surface at a sharp angle. This technique emphasizes depth and texture, making rough materials appear more dramatic. Recessed adjustable trims in the ceiling, aimed at mantels or corbels, highlight three-dimensional details with controlled precision.
Choose fixtures with warm 2700K bulbs to harmonize with firelight. Keep accent lighting output modest, around 20 to 30 percent of your ambient layer’s brightness. The goal is subtle emphasis, not spotlight intensity. If the accent fixtures become the brightest elements in the room, they steal focus rather than supporting it.
Step 4: Position Task Lighting in Adjacent Seating Areas
Task lighting serves the functional areas around your fireplace without pulling focus from the hearth itself. Position floor lamps 15-18 inches from the edge of a reading chair, angled so light falls over the reader’s shoulder rather than toward the fireplace wall. This keeps the illumination contained to the task area.
Table lamps on side tables flanking a sofa should stand 58-64 inches from the floor to the bottom of the shade, ensuring light reaches seated eye level without spilling across the mantel. Choose opaque or translucent shades that direct light downward and outward, not toward the fireplace surround. Swing-arm wall sconces mounted 48-54 inches above seating height offer adjustable coverage for conversation zones while keeping cords and bases out of sight.
Set task fixtures on separate switches from your accent lighting so you can brighten seating areas during use, then dim them to restore the fireplace’s prominence when those zones aren’t active. The goal is functional light that disappears into the background when not needed.
Step 5: Install Dimmer Controls for Flexible Ambiance
Wire dimmer switches on the circuits controlling your ambient ceiling lights and fireplace accent fixtures. This single upgrade lets you dial down general illumination when the fire is burning brightly, then raise it when the hearth is cold, keeping the fireplace visually dominant in both states.
Choose dimmers compatible with your bulb type. LED fixtures require trailing-edge or universal dimmers; older incandescent bulbs work with standard leading-edge models. Mismatched dimmers cause flickering and premature bulb failure. Lutron dimming systems offer reliable LED compatibility and smooth fade curves across a wide range of loads.
Install dimmer switches near the room’s entrance so you can adjust light levels as you enter. For advanced control, wire smart dimmers that allow you to program scenes: a “firelight” preset dims ambient fixtures to 30 percent while keeping accent lights at 50 percent, and a “reading” preset raises task lamps without overpowering the hearth. This flexibility adapts the lighting to evening relaxation, daytime tasks, or entertaining guests around the fire.
Step 6: Balance Light Levels Across the Room
With your fixtures installed and dimmers wired, step back and assess the room as a whole. Turn on all layers at full brightness, then observe from the sofa, armchair, and entryway. Does any single light source pull your attention away from the fireplace? If a recessed downlight creates a bright pool on the floor or a table lamp reads too strong, lower its output until the fireplace naturally holds center stage.
Next, light the fire and repeat the exercise. The hearth’s glow should remain the warmest, most inviting element even when ambient and task lights are active. Aim for a contrast ratio where the fireplace is roughly 20-30% brighter than the surrounding ambient level, enough to feel dominant without plunging the rest of the room into darkness. Check for harsh shadows behind furniture or under the mantel; adjust accent fixture angles or add fill light if needed.
Finally, turn off the fire and test the space again. Your ambient and task lighting should provide comfortable illumination without leaving the fireplace wall in gloom, ensuring the room functions well day or night.
Step 7: Conceal Wiring and Finish Installation
With all fixtures positioned and circuits tested, concealing wiring becomes the final step that preserves the fireplace’s visual dominance. Exposed cables or unfinished junction boxes draw the eye away from the hearth, creating clutter that competes for attention.
Run cables through wall cavities wherever possible, drilling access holes behind fixtures and fishing wire vertically or horizontally using pull tape. For surface-mounted sconces or floor lamps where in-wall routing is impractical, use paintable cord covers that match your wall color and route them along baseboards or crown molding. Install cover plates on all junction boxes and dimmer switches, ensuring they sit flush with the wall surface.
Secure each fixture according to manufacturer specifications, tighten mounting screws on sconces, lock recessed trim rings, and confirm table lamp bases are stable. Patch any drywall holes with spackle, sand smooth, and touch up paint to match surrounding surfaces.
Before restoring power, label each circuit breaker clearly (“Fireplace Accent Lights,” “Reading Lamps”). If you installed smart dimmers or programmable controls, verify you can wire a control panel correctly and test all programmed scenes. Wipe down fixture lenses and reflectors with a microfiber cloth to remove dust and fingerprints, then restore power and confirm every light operates as intended.
Testing Your Lighting Setup: How to Verify Success
After completing installation, run a systematic verification process to confirm your lighting supports the fireplace’s visual dominance. Testing under varied conditions reveals how the room actually functions rather than how it appears on paper.
- Test with all lights on and the fireplace dark during daytime. The fireplace surround should still draw your eye more than any single fixture.
- Turn on the fire and dim all other lights to 50%. The hearth should remain the brightest element, with ambient and accent lighting providing subtle support.
- Sit in each seating position and check for glare from recessed cans, sconces, or lamps. You should see comfortable illumination without harsh reflections or direct view of exposed bulbs.
- Test evening conditions with the fire out and all circuits at full output. The room should feel evenly lit with the fireplace area noticeably highlighted by accent fixtures.
- Cycle through each dimmer setting to confirm smooth transitions without flicker. Verify that reducing ambient light while maintaining accent lighting shifts focus toward the hearth.
Pay attention to CCT color matching between your installed fixtures and the firelight. If LED downlights appear cooler or bluer than the warm glow from burning logs, the mismatch will fracture the room’s cohesion. Walk the space slowly and observe shadows cast by furniture. Deep, undefined shadows near the fireplace suggest insufficient fill light, while overly bright zones flanking the hearth indicate competing focal points.
If the balance feels wrong, start adjustments with dimmer levels before moving fixtures. Often, dropping recessed lights by 20 percent and raising accent lighting by 10 percent restores proper hierarchy. Document what works: note which dimmer positions feel right for morning reading, evening conversation, and late-night fire watching so you can repeat successful settings.
Fine-Tuning: Adjusting Intensity, Color, and Control
After your initial installation, expect to spend a few weeks observing how the lighting performs under different conditions. Start by swapping bulb wattages if ambient fixtures feel too bright or too dim, dropping from 60W-equivalent to 40W in recessed cans near the fireplace can restore visual hierarchy without rewiring. If the color temperature clashes with your fire’s warm glow, replace 3000K LEDs with 2700K versions to create a more cohesive amber wash across the room.
Reposition adjustable accent lights if they’re casting shadows on the mantel or creating hot spots on seating. Tilt recessed trims a few degrees, or rotate picture lights to eliminate glare while maintaining texture on stone or brick. If a fixture consistently draws your eye away from the hearth, remove it, fewer, better-placed sources always beat overcrowding.
Upgrading to smart dimmers unlocks precise control: program smart lighting scenes that automatically shift intensity as daylight fades or when the fire is lit, ensuring the fireplace stays dominant. In summer, when natural light floods the room, you may need to raise ambient levels slightly to prevent the space from feeling cave-like. Revisit your settings each season and after furniture rearrangements to maintain balance.
Common Mistakes and How to Avoid Them
The most common error is overlighting the room, filling every corner with bright fixtures until the fireplace becomes just another illuminated surface rather than the visual anchor. Install ambient lighting at moderate levels and rely on dimmers to pull back intensity when the fire is lit. Another frequent mistake: placing statement fixtures like large pendants or eye-catching chandeliers directly in the fireplace’s sight line, which splits the viewer’s attention. Position bold fixtures to the side or behind seating areas where they support the space without competing for focus.
Mismatched color temperatures sabotage cohesion. If your fireplace emits warm orange tones around 2000K but your ceiling lights blast cool 5000K daylight, the room feels disjointed and the hearth loses its inviting glow. Stick to 2700K, 3000K across all fixtures to harmonize with firelight. Insufficient dimming range is equally problematic: fixed-output lights can’t adapt when the fire provides natural illumination, forcing you to choose between overlighting or darkness. Wire every circuit to dimmers so you can scale back as flames rise.
Finally, many designers test lighting from a single vantage point, usually the main sofa, and miss glare or shadows visible from other seats. Walk the room and sit in every chair with lights on, then repeat with the fire burning. Adjust fixture angles and swap shades if necessary to ensure the fireplace commands attention from all viewing positions.
Frequently Asked Questions
How far should light fixtures be placed from an active fireplace?
Maintain at least 12 inches of clearance between any fixture and the fireplace opening, and consult the fixture’s heat rating if it will be exposed to radiant heat. Recessed lights directly above should be at least 24 inches from the mantel edge to avoid heat exposure issues.
Should I light the fireplace surround directly or rely on reflected light?
Both approaches work depending on your surround material. Stone or brick benefits from grazing accent lights that bring out texture, while smooth marble or tile often looks best with indirect reflected light that avoids glare and hot spots.
How do I balance lighting in a room with a fireplace and large windows?
Use dimmable fixtures throughout so you can reduce artificial light during daytime when natural light is strong, then increase intensity at night. Position ambient lights to avoid window reflections that compete with the fireplace view after dark.
Do gas and electric fireplaces need different lighting strategies than wood-burning units?
Gas and electric units typically produce less intense, more consistent light than wood fires, so you may need slightly brighter accent lighting to maintain visual balance. The lower heat output also allows closer fixture placement, though you should still verify clearances in the unit’s manual.
These questions surface regularly during lighting consultations, and addressing them upfront saves time during installation. Another common concern involves smart controls: for 2026, look for dimmer systems that integrate with voice assistants and allow scene programming, so you can create presets for “fire on” and “fire off” scenarios with a single command. The ability to adjust multiple zones simultaneously makes it easier to shift emphasis as conditions change throughout the day.
If your fireplace sits in a corner rather than centered on a wall, adjust your lighting zones accordingly. Corner installations often benefit from asymmetric fixture placement, with more task lighting on the open side and accent lights emphasizing the fireplace from multiple angles. Test your setup from every seat in the room to confirm the hearth remains the dominant feature regardless of viewing position.
Lighting a room with a fireplace as the focal point isn’t about adding more fixtures, it’s about orchestrating layers that defer to the hearth while serving the space. The seven-step approach you’ve followed ensures your ambient lighting provides general illumination without competing, your accent fixtures frame and enhance the fireplace’s architecture, and your task lighting supports activity in adjacent zones. Dimmers give you the flexibility to adjust as the fire burns or sits cold, maintaining visual balance in every scenario.
If your room presents unique challenges, unusual ceiling heights, complex wiring, or competing architectural features, DonsBulbs Lighting Design can develop a tailored plan that addresses your specific layout and goals. We’ll help you select compatible fixtures, specify proper placement, and design control systems that simplify daily use.
When executed well, this layered strategy does two things simultaneously: it amplifies your fireplace’s presence as the room’s centerpiece and delivers the practical illumination you need for reading, conversation, and movement. The result is a space that feels both intentional and inviting, where light works in service of design rather than against it.